How to Wet Finish Handwoven Fabric
Many people think that once they’ve woven their cloth and taken it off the loom, it’s ready to go. But that’s just the beginning of your handwoven fabric’s journey, especially if it's destined to be worn or used around the home.
What is Wet Finishing and Why is it Important?
Wet finishing is the process of washing your handwoven fabric after it’s been removed from the loom. While decorative handwoven art such as pieces made for wall hanging can skip this step (unless the desired finish requires a change in the woven structure), any cloth intended for functional use (think scarves, cushions, or garments) absolutely should.
This is because usage can cause the fabric to be stretched, rubbed, crushed or soiled, and knowing how to protect against this is crucial when working with handwoven cloth.
While wet finishing won’t fully protect fabric from long-term wear and tear, it strengthens and stabilises your cloth and when paired with good design decisions (such as yarn choice and weave structure), it can help preserve your work for years to come.
What finishing steps should you do before you wash your cloth?
Finishing techniques to complete before washing
There are many ways to finish your handwoven cloth like hemstitch and blanket stitch and it will depend greatly on the type of yarn chosen and intended end use. We will cover this in future blog posts as there are many techniques and approaches you can take.
Measure your handwoven cloth before washing
Handwoven fabric should already have been measured while on the loom so that you are weaving the correct amount of cloth needed for your project. But you should do so again once your cloth is cut off the loom (and before washing) so that you can track how much the cloth has contracted when released from tension. This is called the ‘take up’.
This will help you to understand what percentage ‘take up’ you have had from your specific warp, weft, and pattern combination. Each of these parameters can affect what your cloth looks and feels like at the end, so it is important to track this information for future reference.


Why Wet Finish Your Cloth?
Here are some of the main reasons why you would wash your handwoven fabric:
- You need to clean the yarn as some contain oils from the manufacturing process.
- The cloth may have picked up dirt or dust from the loom during the weaving process.
- You want to understand and record the shrinkage of the cloth after washing because every combination of warp and weft will contract differently.
- Washing your cloth will give you the final cloth size for your project.
- Washing softens the cloth, especially wool, mohair and other natural fibres.
- The heat from the water begins the felting process in some fibres, helping to strengthen the cloth.
How do you wash your cloth?
Washing your handwoven cloth shouldn’t feel overwhelming. It is a simple process of washing and rinsing your fabric so that you can get onto the final step of sewing in ends or sewing it into a finished product.
Here are some simple steps to wash your handwoven fabric:
- Fill your tub with enough lukewarm water to submerse the cloth.
- Dissolve a small amount of the washing up liquid (or your favourite fabric wash) to create enough bubbles to clean the cloth. It doesn’t need to be overly soapy.
- Lay your cloth into the water to absorb the soapy water. You can leave your fabric to soak or gently agitate it to encourage the release of oils and dirt.
- Watch how your cloth releases any oil or dirt. This will usually present itself as a greyish coloured water. It might also release dye, so keep an eye out for this as leaving your cloth in lightly dyed water can re-dye your cloth!
- If your water begins to cool, gradually introduce more hot water. Remember that heat causes the felting process in some fibres like wool and mohair, so it is best to avoid extremely hot water to prevent over felting.
- Many fabrics don’t need to be soaked for long. 5 minutes is usually sufficient, but if you find the water to be a darker grey, you may need to repeat the washing process.

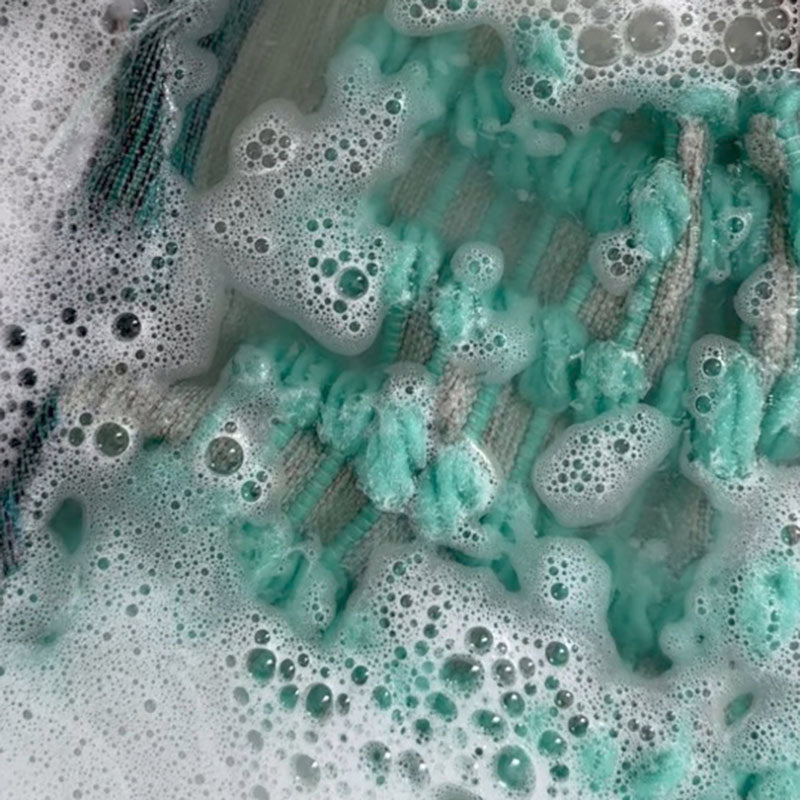
Handwoven fabric being washing using washing up liquid (above).
A few things to note:
- Water temperature matters when you have woven fabric with natural fibres like wool, mohair etc. Hot water can shrink, damage or felt the fibres, so use common sense and test small samples before to understand how your cloth will behave.
- Agitation can also encourage felting, which may be a welcome or unwelcome part of your finished cloth. If you don’t want felting to occur, introduce hot water gradually, keep it at a lower temperature and don’t agitate. If a little felting is OK, then the steps above should be fine.
- Shrinking may also be a welcome by-product of washing. If so, hotter water is OK, but introduce it gradually. Leaving the cloth in to soak longer will also help with this.
Rinse and repeat!
- Once your handwoven fabric has been soaking for a few minutes and your water is a little greyish, empty the water, squeeze your fabric to release the remaining water and fill the tub again with fresh clean, lukewarm water.
- Soak and lightly agitate again for a few minutes, empty the water, squeeze your fabric and your cloth is ready for the next step.
- If the water is still grey, you may need to repeat the washing and rinsing steps again.
A few things to note:
- It is best not to wring your fabric as this can stretch and distort more delicate fabrics.
- However, in some circumstances (like a thicker cotton cloth), you can feel confident that wringing out the water won’t have a lasting impact.
- As always, exercise common sense.

How do you dry your handwoven cloth?
Most handwoven fabrics can be laid out flat to dry without much thought. But depending on how much fabric you have woven, the yarns and fibres used and your intended fabric outcome, you have a few options.
Simple steps for drying your cloth:
For lighter/ delicate fabrics
- Lay out to dry on a flat surface like an ironing board.
- Avoid hanging the cloth as this may distort the fabric.
For sturdier, longer, or heavily absorbent fabrics
- Lay out a towel big enough for the fabric.
- Lower the fabric onto the towel, folding as necessary.
- Wrap the cloth in the towel, folding over and rolling into a bundle.
- Stomp on the towel to absorb the excess water.
- Once most of the water is absorbed, remove from a towel, and lay flat to dry, hang over a banister or drying rack.

Handwoven fabric wrapped in a towel and stomped on to absorb excess water (above).
A few things to note:
- Remember that using a towel will help to absorb the excess water, minimise felting, stretching and overall damage to the fabric.
Can you speed up the drying process?
In most circumstances you will want to avoid drying your cloth on direct heat sources like a radiator, in the dryer or in direct sunlight as it will continue to shrink your fabric. But on some occasions, it will help to achieve the intended results far quicker.
A few things to note:
- Some projects will advocate using a dryer for your cloth. If you are working with cotton and linen, you might be tempted to pop your handwoven fabric into the dryer.
- If you want to try this method, check the advice on the yarn you have purchased and always test with a small sample first before committing your whole project!
- Woollens and other natural fibres don’t take too kindly to the dryer but may help to felt or ‘full’ the yarn you are using. Always test a small sample first!

Handwoven fabric drying over a bannister to avoid distortion (above).
Stretching or Shaping While Drying
Some weavers shape their cloth while drying to retain or adjust the final dimensions. You can pin your work to a board or blocking mat if precise shaping is required (similar to blocking in knitting).
Final advice on how to wet finishing your handwoven fabric?
Wet finishing is a key stage in the weaving process, one that adds durability, improves texture, and helps you truly understand how your yarns behave. Whether you’re weaving for functional fashion, interior décor, or textile art, this step ensures your work stands the test of time.
Want to learn more? Visit The Oxford Weaving Studio Blog for more weaving tutorials and tips or join a class to expand your skills with hands-on help.
Happy weaving!
Cass